Text Editing
Sample Badge
Short summary of this page.
Text Editing Guide for Avada Live Builder
Section titled “Text Editing Guide for Avada Live Builder”This guide will show you how to edit and format text content using the Avada Live Builder.
Accessing and Editing Text Content
Section titled “Accessing and Editing Text Content”Step 1: Select the Text Element
Section titled “Step 1: Select the Text Element”- In Avada Live Builder, click directly on the text you want to edit
- You’ll see a blue outline around the selected element
- For nested elements, you may need to click multiple times or use the Navigator panel

Selecting a text element in Avada Live Builder
Step 2: Enter Edit Mode
Section titled “Step 2: Enter Edit Mode”- Once selected, click again or double-click to enter edit mode
- Your cursor will appear in the text, allowing you to type
- You can now add, delete, or modify text content

Text edit mode with cursor active
Using the Inline Formatting Toolbar
Section titled “Using the Inline Formatting Toolbar”When you select text, the inline formatting toolbar appears above it with these options:
Typography Options (T icon)
Section titled “Typography Options (T icon)”- Click the “A” icon to open typography settings
- Adjust font size using the slider or input field
- Change line height to control spacing between lines
- Modify letter spacing for visual effect
- Select different heading tags (H1-H6, p, etc.)
- Choose different font families if available


Typography options in the inline toolbar
Text Color
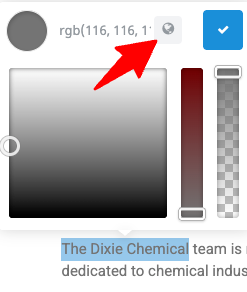
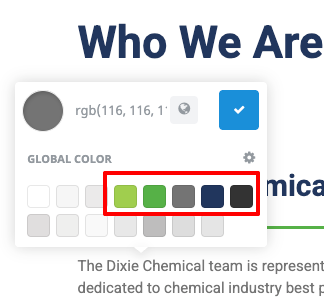
Section titled “Text Color”- Click the color palette icon
- Select from preset colors
- Use the color picker for custom colors
- Apply the selected color to your text

Text color options
Basic Formatting
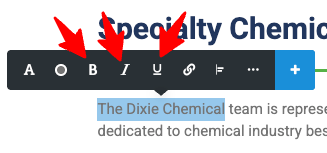
Section titled “Basic Formatting”- Bold: Click the “B” icon or use Ctrl+B
- Italic: Click the “I” icon or use Ctrl+I
- Underline: Click the “U” icon or use Ctrl+U
Basic formatting options
Extended Formatting
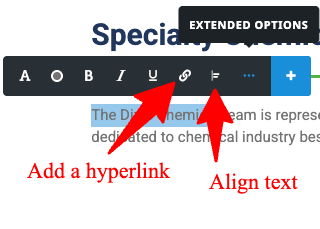
Section titled “Extended Formatting”- Click the three dots (…) for more options
- Add bulleted or numbered lists
- Insert blockquotes
- Add links
- Align text (left, center, right)
- Clear formatting
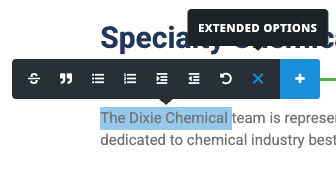
Extended formatting options
Best Practices for Text Editing
Section titled “Best Practices for Text Editing”When to Use Inline Editing vs. Element Settings
Section titled “When to Use Inline Editing vs. Element Settings”- Use inline editing for:
- Changing specific words or phrases
- Adding formatting to portions of text
- Quick content updates
- Use element settings for:
- Changing all text in an element
- Adjusting spacing, margins, or padding
- Setting responsive behavior
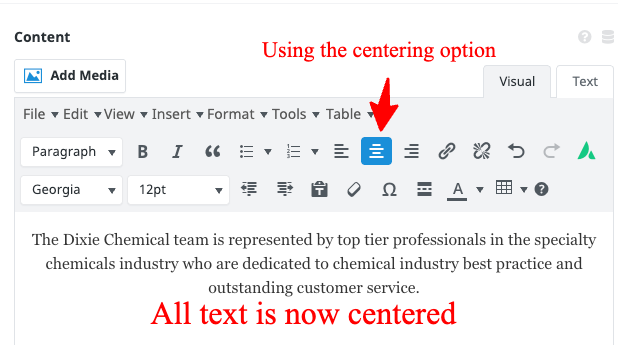
Comparison of element settings vs. inline editing
SEO Best Practices
Section titled “SEO Best Practices”- Use proper heading hierarchy (H1, H2, H3, etc.)
- Include relevant keywords naturally in headings and content
- Keep paragraphs concise and scannable
- Use descriptive text for links instead of “click here”
Web Writing Tips
Section titled “Web Writing Tips”- Write in clear, simple language
- Use short paragraphs (2-3 sentences)
- Utilize bullet points for lists
- Include subheadings to break up long content
- Front-load important information
Common Text Editing Tasks
Section titled “Common Text Editing Tasks”Updating a Page Heading
Section titled “Updating a Page Heading”- Click on the heading text
- Enter edit mode and modify the text
- Use the Typography options to adjust size if needed
- Save your changes
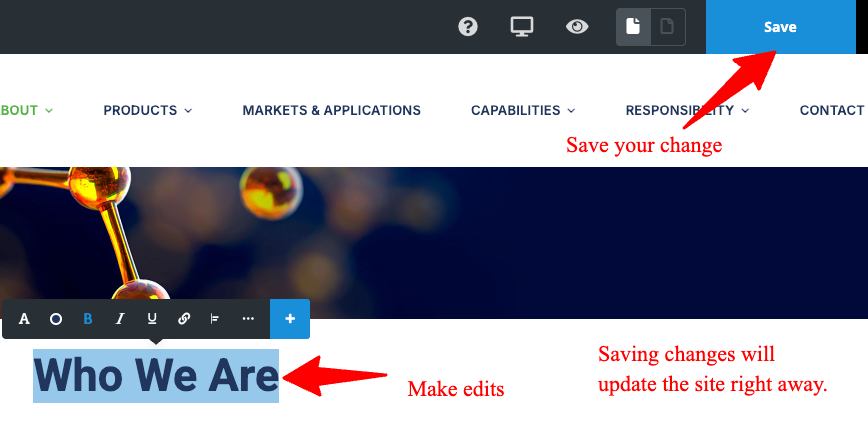
Editing a page heading
Formatting Key Information
Section titled “Formatting Key Information”- Select the specific text you want to emphasize
- Use Bold, Italic, or Highlight to make it stand out
- Consider using a different color for important notes
- Don’t overuse formatting – be selective for maximum impact

Formatting key information
Creating Bulleted Lists
Section titled “Creating Bulleted Lists”- Place your cursor where you want the list
- Click the three dots (…) to open extended options
- Select the bulleted list icon
- Type your first item and press Enter for each new item
- Press Enter twice to exit the list format

Creating bulleted lists
Troubleshooting Text Editing Issues
Section titled “Troubleshooting Text Editing Issues”Text Changes Not Saving
Section titled “Text Changes Not Saving”- Make sure you’ve clicked the Save button in the top toolbar
- Check if you’re in preview mode (can’t edit in preview)
- Try refreshing the page and attempting the edit again
Formatting Not Applying Correctly
Section titled “Formatting Not Applying Correctly”- Make sure you’ve selected all the text you want to format
- Try applying formatting one option at a time
- Check if the element has style overrides in the element settings
Can’t Edit Specific Text
Section titled “Can’t Edit Specific Text”- Some text may be part of special elements that require different editing approaches
- Try using the Navigator panel to select the correct element
- Check if the text is part of an image or other non-editable element
Next Steps: Now that you know how to edit text content, proceed to the Image Management Guide to learn how to work with images.